Cookie
Electronic Team, Inc. uses cookies to personalize your experience on our website. By continuing to use this site, you agree to our cookie policy. Click here to learn more.

Linux Serial Ports - Full Guide

Nikolai Svarachevsky Nikolai Svarachevsky
Updated: Aug 4, 2026

Here, you can learn how to connect to a Linux serial device, as well as a simple way to connect attached serial devices to a remote computer. I will be using an ESC/POS compliant receipt printer as an example.

14-day Free Trial available
License price starts at $259.95
Available for
usb to remote desktop

Checking Your Ports

Serial ports are a type of serial device. The dmesg command will help you see if a serial device was detected and recognized by the operating system. If it was, it will be listed in the output of this command.

Since dmesg lists all of the system’s devices, we will filter the output through grep. It searches text for lines that contain the provided keyword. The names of serial ports on Linux start with “ttyS”, so we can use that as the query. Output from dmesg can be passed to grep by connecting the two commands with a pipe (the | symbol). It will also require superuser privileges, so sudo needs to be added. The resulting command looks like this:

sudo dmesg | grep tty
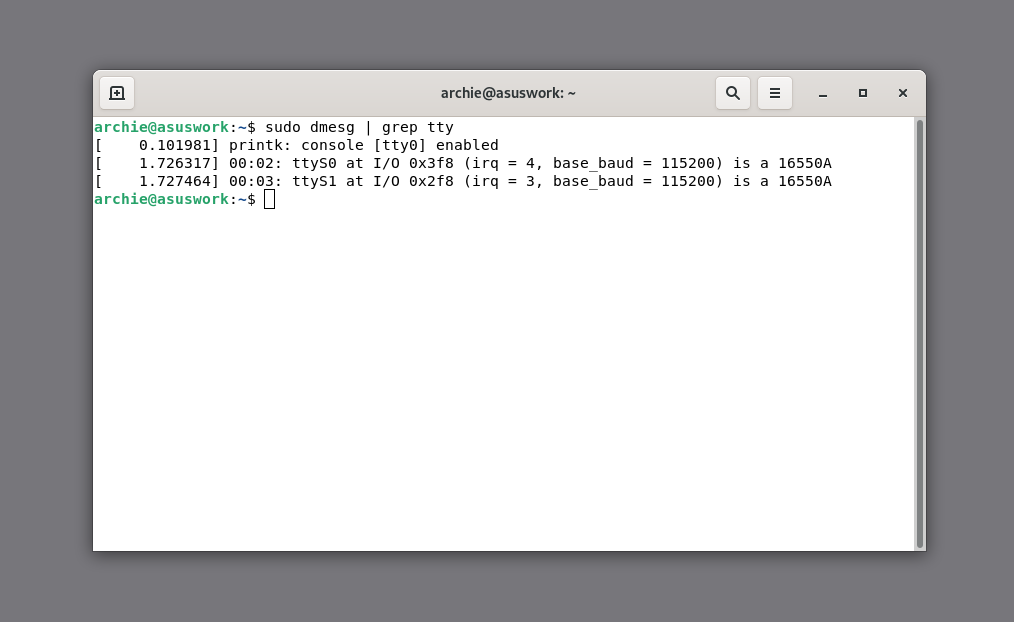
dmesg search results
The devices will be listed along with their corresponding device file names. These are files in /dev, such as ttyS0 and ttyS1, that we can later use as arguments for other commands, to specify which serial port should be interacted with. In addition, dmesg can indicate a technical problem if the device doesn’t show up at all.

If you are using USB-to-serial adapters, they will show up as ttyUSB devices. They can also be found in dmesg using the same command.

Important: in order to use the system's serial ports, a user needs to be in the dialout group. While this is not the problem for the first, default user, it becomes one when trying to access serial ports as other users, ones that were created after the system was installed.

In other words, if you encounter the error "Could not open serial port...", run the following command:

sudo adduser your_user_name dialout

Substitute "your_user_name" for the user that has trouble accessing ports.
Interacting with Serial Devices

Using standard utilities

Since serial ports are represented by files on Linux, standard utilities such as echo and cat can be used to interact with them. stty can be used to change the port’s settings. Let’s see how each of these applications is used.

With stty, you can set the port’s baud rate, amount of data bits, parity, handshake type (also known as flow control), and other parameters. This may be necessary to interact with a device or an application, since most of the time, the parameters have to match for the connection to work.

Note from Nick:
I ran the following demonstration on Debian 11 (Bullseye) with an SP-POS88VMF printer.
However, you can also try out the provided commands with a null-modem connection between two serial or USB-to-serial ports on the same computer. In that case, you will need to modify the cat command to listen to the other connected port, not the sending one.


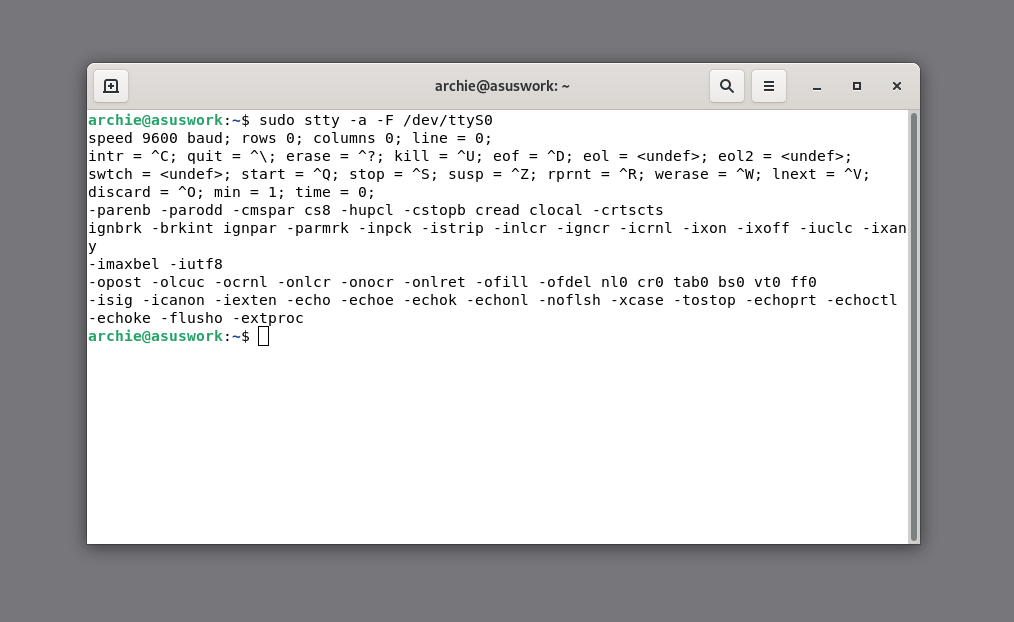
Use the following command to list your port’s current settings:

sudo stty -a -F <your port>
Viewing the port's settings with stty
And this is an example command that sets the ttyS0 port’s baud rate to 9600, data bits to 8, and enables RTS/CTS handshaking:

sudo stty -F /dev/ttyS0 9600 cs8 crtscts

With the proper settings selected, we can send data to the device with echo. It’s possible to send plain text to a serial port with echo, like this:

echo 'TEXT' > /dev/ttyS0

However, to do this, you need to log in as a superuser. This can be done with the “su -” command.

In our case, special ASCII symbols, such as ESC and Carriage Return, are needed to make full use of the connected printer. One way to do this is using echo’s -e argument and escape sequences. An escape sequence for ASCII characters is started with \x, followed by a hexadecimal number that corresponds to the character.
For example, this is how the word “TEXT” can be printed with escape sequences:

echo -e '\x54\x45\x58\x54'

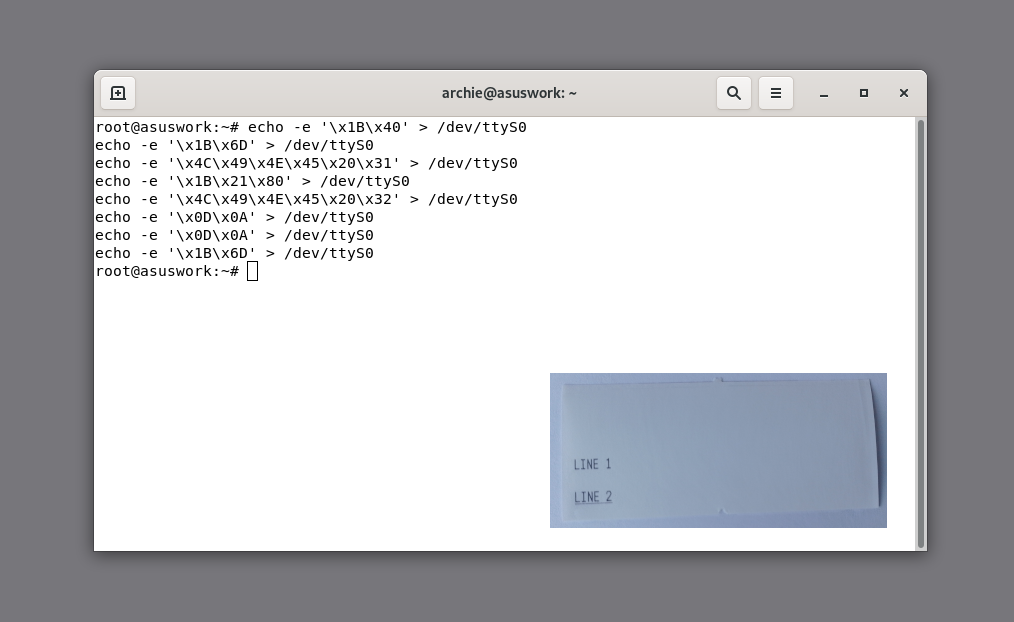
We will send the following messages:

1B 40 (ESC @, Initialize)
1B 6D (ESC m, Full Cut)
4C 49 4E 45 20 31 ("LINE 1")
1B 21 80 (Enable Underline)
4C 49 4E 45 20 32 ("LINE 2")
0D 0A (CR LF, New Line)
1B 6D (Full Cut)


The -e argument is needed to allow the “\x” hexadecimal escape sequences. This is what it looks like in the terminal, and on the resulting print:
Printer commands over echo and printing results
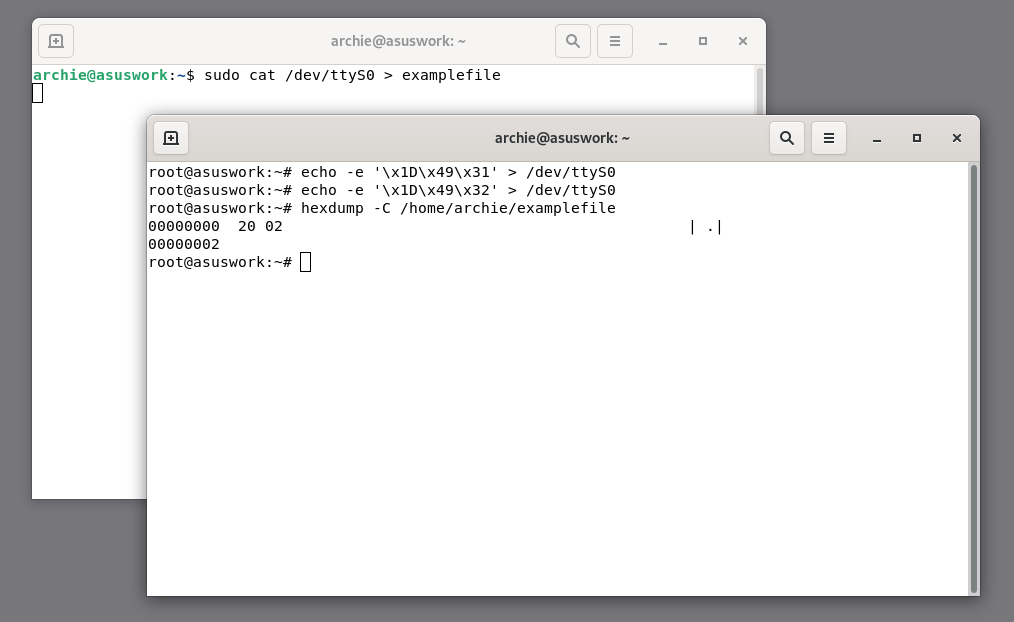
While echo can be used to send data over a serial connection, cat can be used to receive it. In our case, the printer will respond to standard ESC/POS requests for status and ID information. This means that we'll need to catch the responses. First, we will launch cat, listening to the ttyS0 device and redirecting the output to a text file:

cat /dev/ttyS0 > examplefile

The application must keep running to receive data, so a new Terminal window or tab needs to be opened to send requests to our device. We will use echo to send the following:

1D 49 31 (Request model ID)
1D 49 32 (Request type ID)
Since the responses will be provided in hexadecimal format, direct cat output, which was recorded to “examplefile”, will not be human-readable. Instead, we will run the file through hexdump:
Printer request and response

Using gtkterm

Linux also provides serial terminals like minicom and gtkterm that can comprehensively interact with serial ports, handling both input and output, providing more formatting options, and making things easier overall.

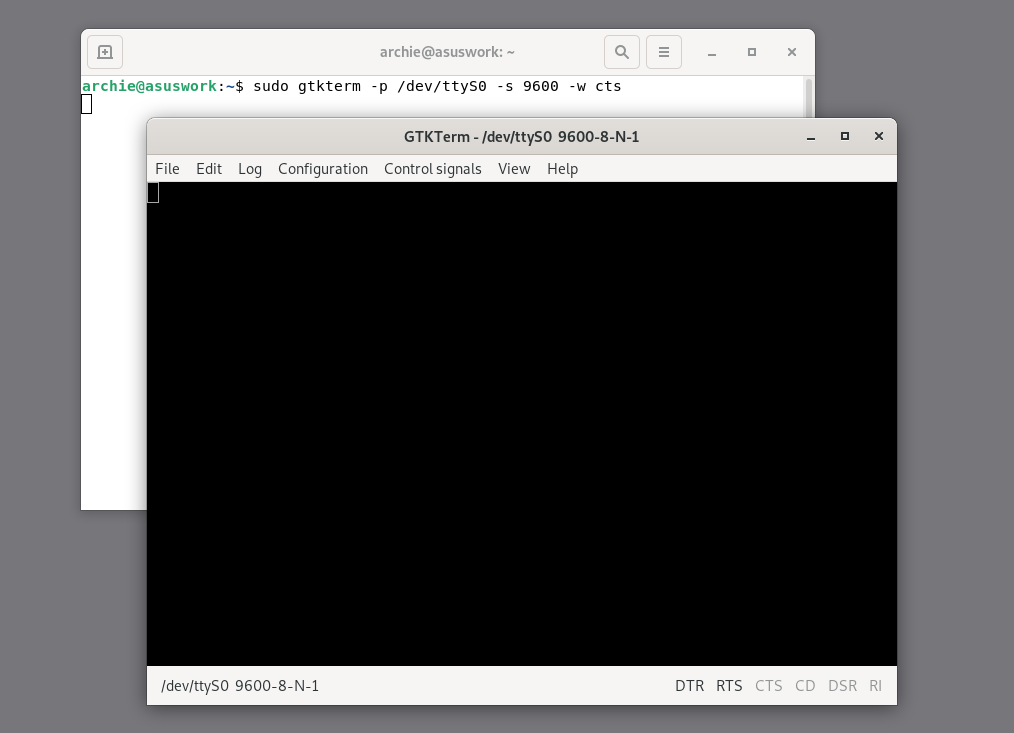
As an example, we’ll try gtkterm. Similarly to stty, gtkterm needs to be launched with command line arguments to specify the connection settings, if the defaults are not suitable.

Note from Nick:
While Minicom is a highly flexible tool, the complicated controls make it unsuitable for use by beginners, and difficult to cover in a quick guide. If you want to begin learning about Minicom, start with its man page to avoid getting confused once you launch the app.

GTKTerm interface
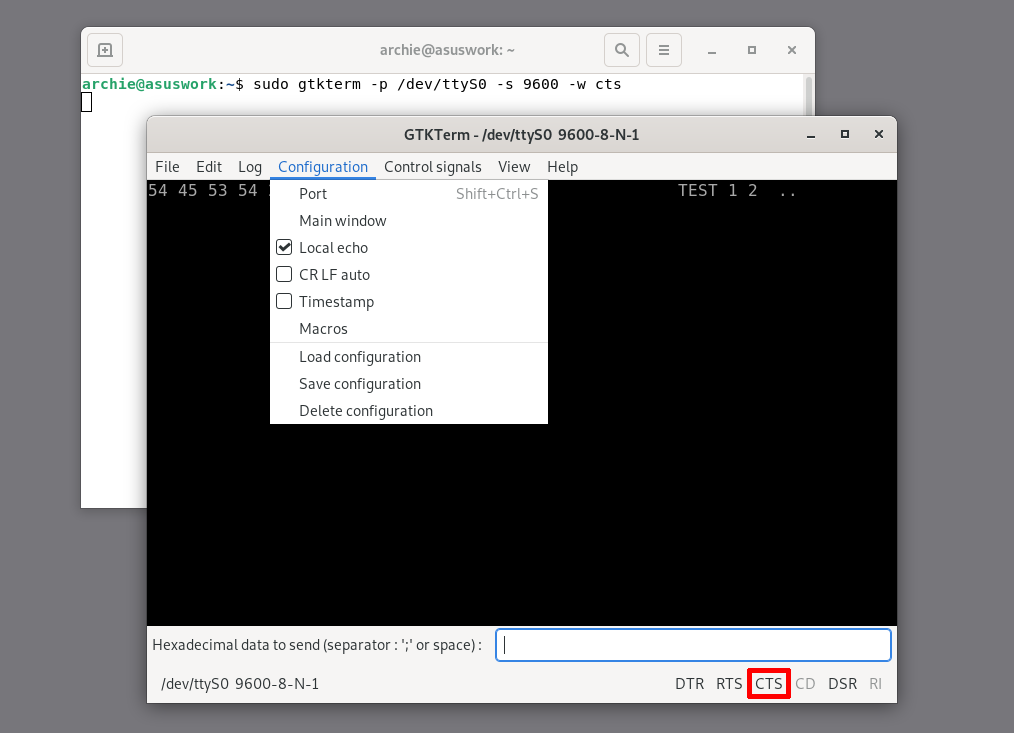
Some useful options include local echo (to duplicate the data you send on your side), logging, hexadecimal view, and sending hex data. Also, note the indicators in the bottom right - they show the states of DTR, RTS, CD, DSR, and RI signal lines - it's another way to see that the device is connected and prepared to receive data.
Configuration menu and handshake indicators in GTKTerm

Connecting to a Serial Port on Your Local Network

In some cases, a serial device needs to be shared between multiple computers, or you may want to substitute a physical serial connection between two computers with a virtual one. One of my projects - Serial to Ethernet Connector - is an efficient way to accomplish this. In addition to making physical ports available on a local network, the application can create virtual ports that can be accessed by applications.

Serial to Ethernet Connector can be set up quickly, and has a command-line interface that makes it easy to integrate in a Terminal workflow, or bash scripts. Detailed documentation, user guides, and customer support experts will be there to help. Furthermore, there is a 15-day Free Trial available, so I highly recommend giving it a try.

How to Use Serial to Ethernet Connector

1
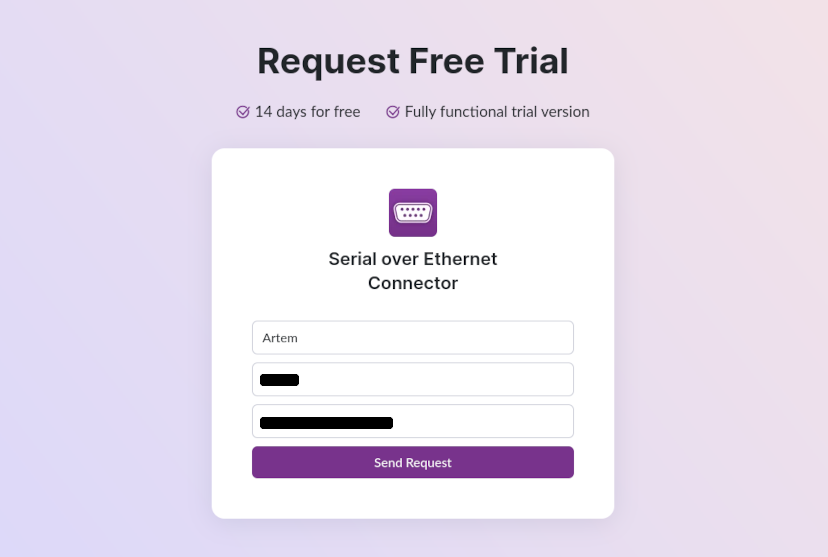
Sign up for a free trial at this page. Wait for the activation key to arrive to your mailbox.
Sign up for a free trial
2
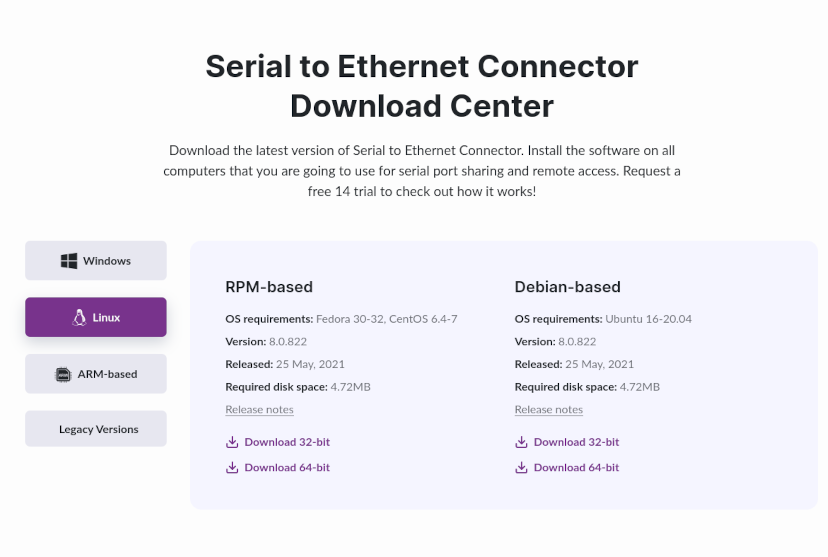
Head to the Download Center. Choose the right installer for your Linux distribution and architecture.
Head to the Download Center
3
Open your Terminal, navigate to the file, and use the following commands on Debian-based systems (will need superuser access):

dpkg -i serial_ethernet_connector_64.deb
apt-get install -f


Or this command on Fedora or CentOS:

sudo rpm -i serial_ethernet_connector_64.rpm

Once the installation is finished, restart your computer.
4
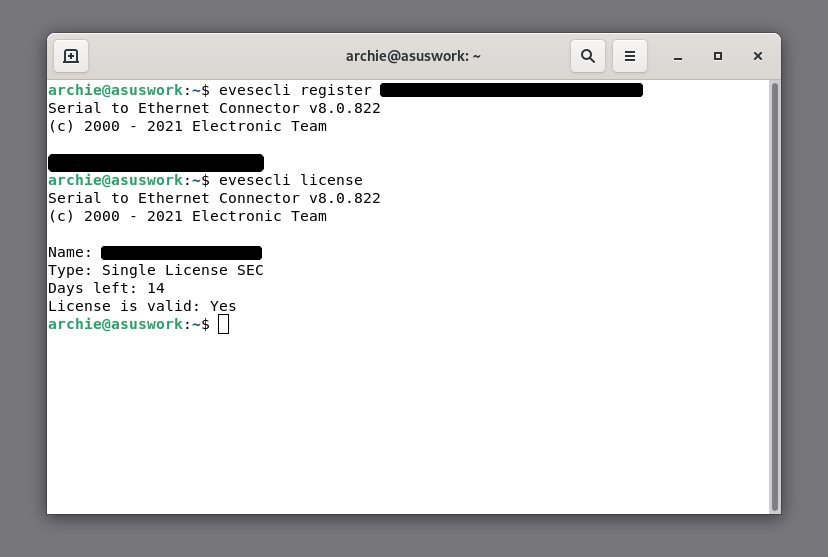
Use your activation code by running the following command:

evesecli register <your activation code>

Activation can be verified by running:

evesecli license

These installation and activation steps will need to be completed on both of the machines that will be connected.
Use your activation code
5
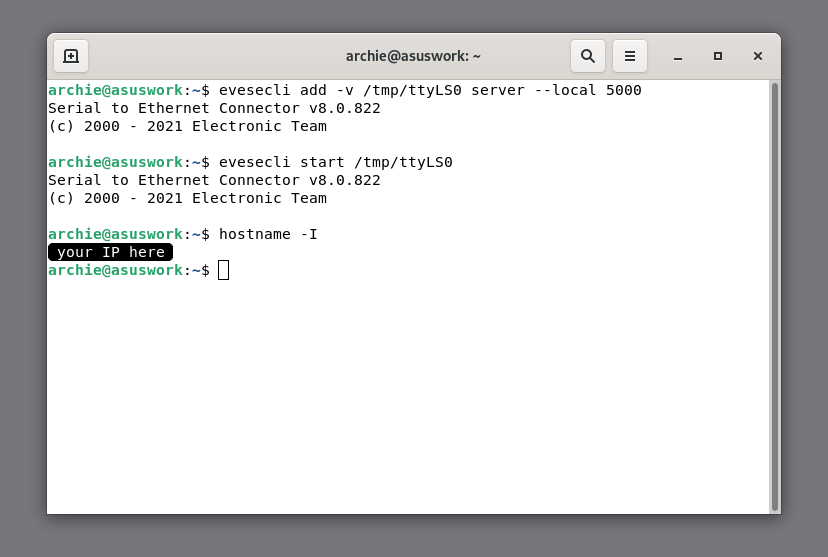
Since we will be sending messages between two applications, we will create virtual ports for both the server and the client. Start by using the following command on the server:

evesecli add -v /tmp/ttyLS0 server --local 5000

The “start” command will open the connection:

evesecli start /tmp/ttyLS0

In addition, you will need to know your computer’s IP address on the local network. Run “hostname -I” (capital i).
create virtual ports for both the server and the client
6
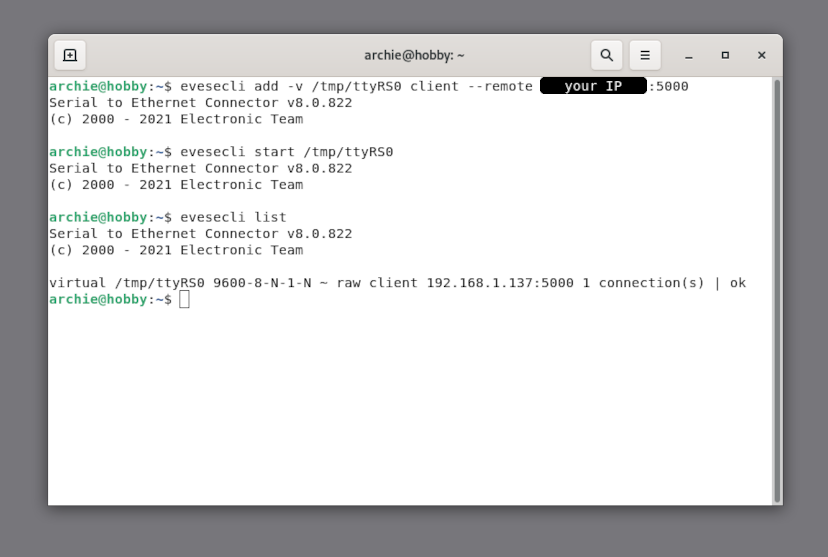
On the client computer, run the following:

evesecli add -v /tmp/ttyRS0 client --remote <your IP address>:5000
evesecli start /tmp/ttyRS0


You can verify whether the connection was successful by using “evesecli list”. It should show that there is 1 connection.
verify whether the connection was successful
7
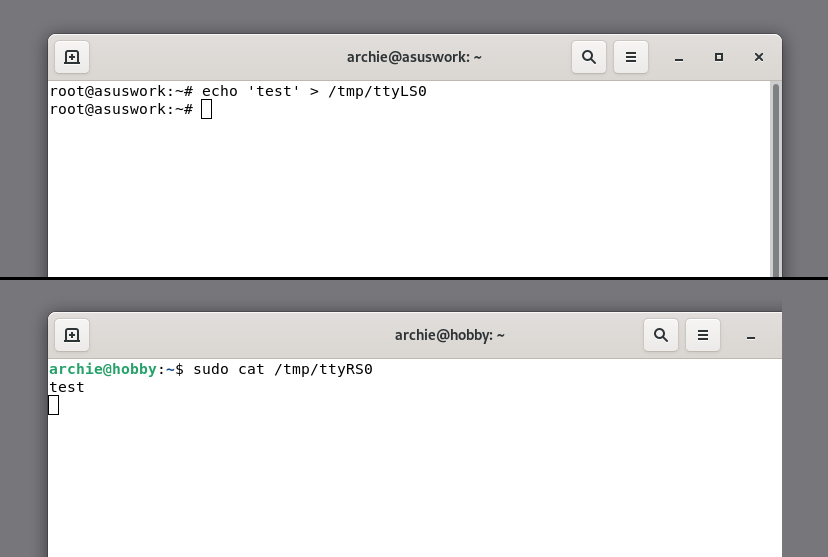
Finally, since the connected ports are both virtual, they can be tested, as previously, with cat/echo.
since the connected ports are both virtual, they can be tested
Don’t forget that you can use “man evesecli” to get more information about the available options and commands. Additionally, there is a user guide that can be consulted for examples and overall information about the use of Serial to Ethernet Connector.

My Credentials

I'm Nikolai Svarachevsky - a senior dev employed at Electronic Team, Inc. I am a lead developer on multiple projects, including Serial to Ethernet Connector. I've written commercial-grade code for the purposes of serial communication, networking, and encryption. Additionally, I'm a Linux power user, and I love finding new ways to use both built-in utilities and third-party software to solve problems, whether simple or complex! May you find this guide helpful.
Serial to Ethernet Connector
Access remote serial port over IP Network for Windows
14-day Free Trial available
License price starts at $259.95
Available for